**The first time I rode the Yurikamome Line with my camera clutched in my lap, I nearly missed my stop because I couldn’t stop shooting through the front window.** There I was, no driver in front of me (the trains are fully automated), gliding above Tokyo Bay at golden hour, the Rainbow Bridge unfurling like ribbon across the water, and Mount Fuji making a surprise cameo on the horizon. If you’re a photography enthusiast planning your Tokyo trip, let me save you some heartbreak: most travel guides bury the Yurikamome under generic Odaiba tourist talk. They miss the point entirely. This driverless monorail isn’t just transportation — it’s one of the best moving photo studios in Japan.
Let me walk you through how to actually shoot this line properly, where to get off, and the small mistakes I made so you don’t repeat them.
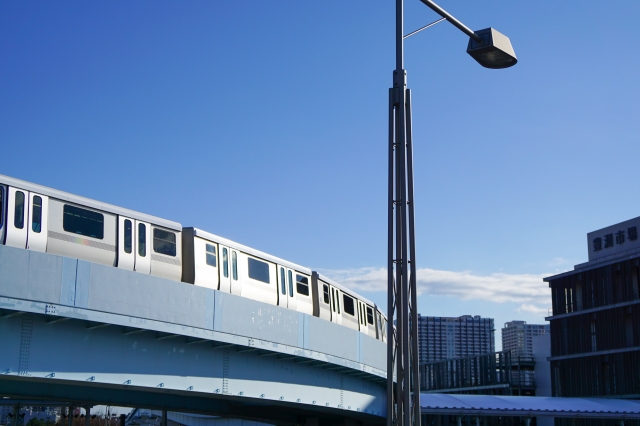
## Why the Front Seat Is Your Real Tripod

Here’s the secret nobody tells you upfront: the Yurikamome has no driver’s cabin. The front of the first car has a panoramic window, and those seats are pure gold for photographers. I learned this the hard way on my first trip when I boarded at Shimbashi Station like a normal person and ended up squeezed near the door, shooting through other passengers’ heads.
Now I always do this: I get to Shimbashi Station (the line’s northern terminus) about 15 minutes before I want to depart. The Yurikamome runs roughly every 4-6 minutes, costs ¥330-390 depending on distance, or you can grab a one-day pass for ¥820 — which is what I recommend if you’re hopping off and on for photos. Trust me, you will be.
When the train pulls in, I walk briskly (not aggressively, this is Tokyo) to the very front car and claim a front-facing seat. On weekdays mid-morning, I’ve had the entire front bench to myself. On weekends, families with kids will be there first because their toddlers love pretending to drive. Be gracious — those photos of small children pressed against the glass watching Tokyo unfold? Take them too. Some of my favorite candid shots happened that way.
The light I love most: late afternoon, about 90 minutes before sunset, heading southbound from Shimbashi. The buildings of Shiodome cast long shadows, and as the train banks into its famous 360-degree loop before crossing the bay, you get this incredible rotating cityscape. Shoot in continuous burst mode. You’ll thank yourself later.
## The Rainbow Bridge: Shoot It From the Train AND Beneath It
I’ll be honest — the Rainbow Bridge looks better in photos than in person from far away. It’s white during the day (the “rainbow” comes from colored lights at night), and from a distance it just reads as a normal suspension bridge. The magic is in the angles you can only get by working both the Yurikamome and the waterfront on foot.
From the train, the best moment comes between Shibaura-futo and Odaiba-kaihinkoen stations, when you’re actually crossing the bridge itself. Shoot wide to capture the cable geometry overhead, then switch to a longer focal length for compression shots of the bay with Tokyo Tower poking up behind the cranes. I remember pressing my lens nearly flat against the glass to kill reflections — bring a rubber lens hood if you have one, it’ll save you in post-processing.
But the killer shot? Get off at **Odaiba-Kaihinkoen Station** and walk five minutes to Odaiba Seaside Park. From there, you’re looking back at the bridge with Tokyo’s skyline behind it. I went at blue hour on a cool October evening — the kind where the bay smells faintly of salt and diesel from the small boats — and got the shot I’d been chasing for years: the bridge illuminated, the Statue of Liberty replica in the foreground (yes, there’s one, don’t ask), and the city glittering beyond. Bring a small travel tripod. Security here is relaxed about it, unlike some Tokyo locations.
The bridge lights up around sunset and stays lit until midnight. On special occasions, the lights shift to actual rainbow colors. Check the official schedule before you go — I once trekked out specifically for the rainbow display and arrived on a plain white-light night because I hadn’t done my homework.
## Daiba Station and the teamLab Detour
Get off at **Daiba Station** (one stop after Odaiba-Kaihinkoen) if you want the postcard composition: the elevated platform itself offers a clean shot of the bridge framed by palm trees and Fuji TV’s distinctive spherical observation deck. I’ve shot from this platform at every time of day, and I’ll tell you my favorite: about 30 minutes after sunrise on a clear winter morning. The crowds are nonexistent, the light is buttery, and on cold dry days Mount Fuji appears with crystalline clarity behind the bridge.
For interior photography, this is also your stop for **teamLab Borderless** (which relocated to Azabudai Hills, so check current location before you go) and the older **teamLab Planets** in Toyosu, accessible via a different line. But the Fuji TV Building itself is worth your time — the observation deck (¥800, open 10am-6pm, closed Mondays) gives you a 100-meter-high view back across the bay. I shot a time-lapse from up there of boats threading under the Rainbow Bridge and it became my favorite Tokyo clip.
## Telecom Center and the Industrial Side Nobody Photographs
Here’s where I get to share my favorite underrated stop: **Telecom Center Station**. Most tourists skip it entirely. They shouldn’t.
The Telecom Center observation deck (¥500, open 3pm-9pm on weekdays, 11am-9pm weekends) sits on the 21st floor and faces directly toward the port. This is where you get the industrial Tokyo nobody photographs — towering cranes, container ships, the gritty working bay with the sleek skyline as backdrop. I came here on a stormy August afternoon when typh