There are shrines in Japan that feel serene and meditative, and then there is Nikko Toshogu — a shrine that feels like someone turned the volume up to eleven and then gilded every single surface for good measure. For photographers, this place is not just a destination; it is an obsession. Every carved panel, every cedar-draped stone lantern, every mossy step disappearing into the forest is a frame waiting to be composed. I have been to Nikko four times now, and I still walk away with a memory card so full it feels like I robbed a gallery.
The first time I stepped off the Tobu Nikko Line train, it was a mid-October morning and the air smelled like damp cedar and something faintly smoky — incense drifting down from the shrine complex above. The light was that particular pewter-grey that photographers quietly celebrate, the kind that makes reds and golds burn without blowing out. I remember stopping on the stone bridge near the entrance, looking up the cedar-lined avenue, and just standing there with my camera hanging at my side, momentarily too stunned to even lift it.
Why Nikko Is a Photographer’s Dream Destination
🎫 Book on Klook: Nikko UNESCO World Heritage photography →
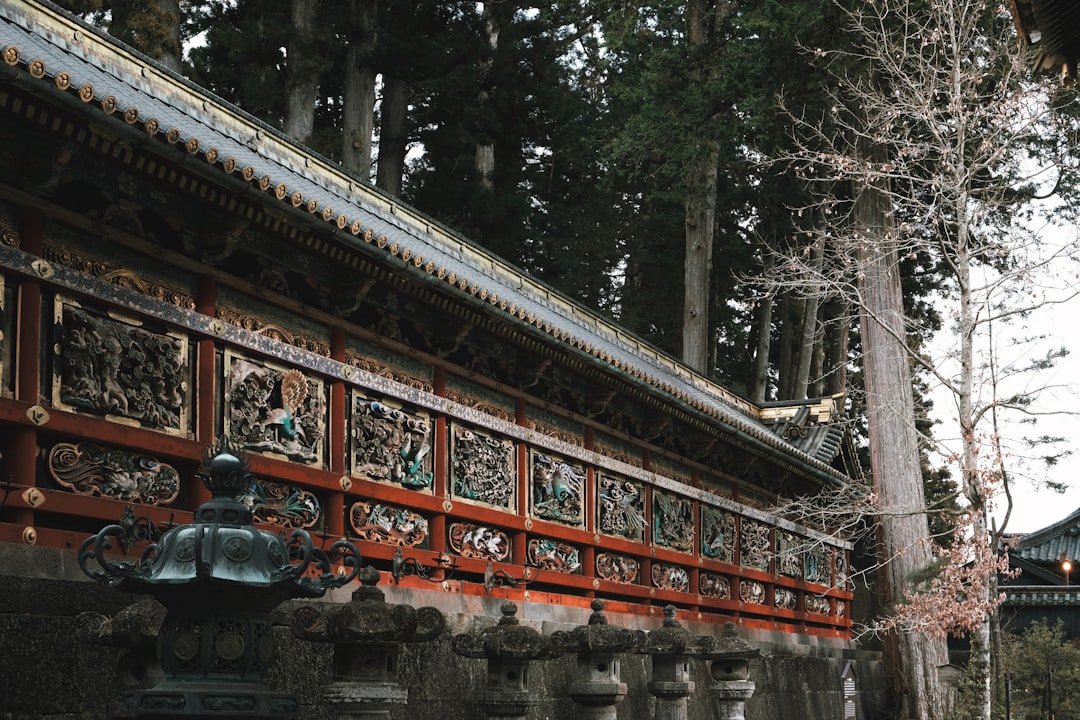
Nikko Toshogu is the mausoleum of Tokugawa Ieyasu, the shogun who unified Japan, and it was built to impress — to intimidate, even. Unlike the wabi-sabi minimalism of many Japanese temples, Toshogu is baroque, dense, and deliberately overwhelming. There are over 5,000 carvings on the Yomeimon Gate alone. For a photographer, this means infinite detail shots, endless compositional possibilities, and a subject that rewards patience and revisiting.
Beyond the shrine complex itself, the surrounding Nikko National Park delivers a completely different palette — ancient cryptomeria forests, tumbling waterfalls, and mountain mist that rolls between the trees like something from a ink-wash painting. If you are planning a comprehensive Nikko day trip from Tokyo, factor in time for both the shrine and the natural landscapes that surround it.
Getting There: The Train That Sets the Mood
From Asakusa Station in Tokyo, the Tobu Revaty or Spacia express trains to Tobu Nikko take about 1 hour 50 minutes and cost around ¥1,360 one way for the reserved seat (highly recommended for gear-heavy shooters who want a real seat). There is also the JR Nikko Line from Shinjuku via Utsunomiya if you have a JR Pass.
Leave Tokyo by 7:00 AM. This is non-negotiable if you are serious about photography. The morning light in Nikko — especially in autumn — is irreplaceable, and the crowds that roll in after 10:00 AM will make clean architectural shots nearly impossible.
The Nikko Toshogu Complex: Where to Point Your Camera First
🗾 Book on Viator: Personal photographer to capture shrine →
The Omotesando Cedar Avenue
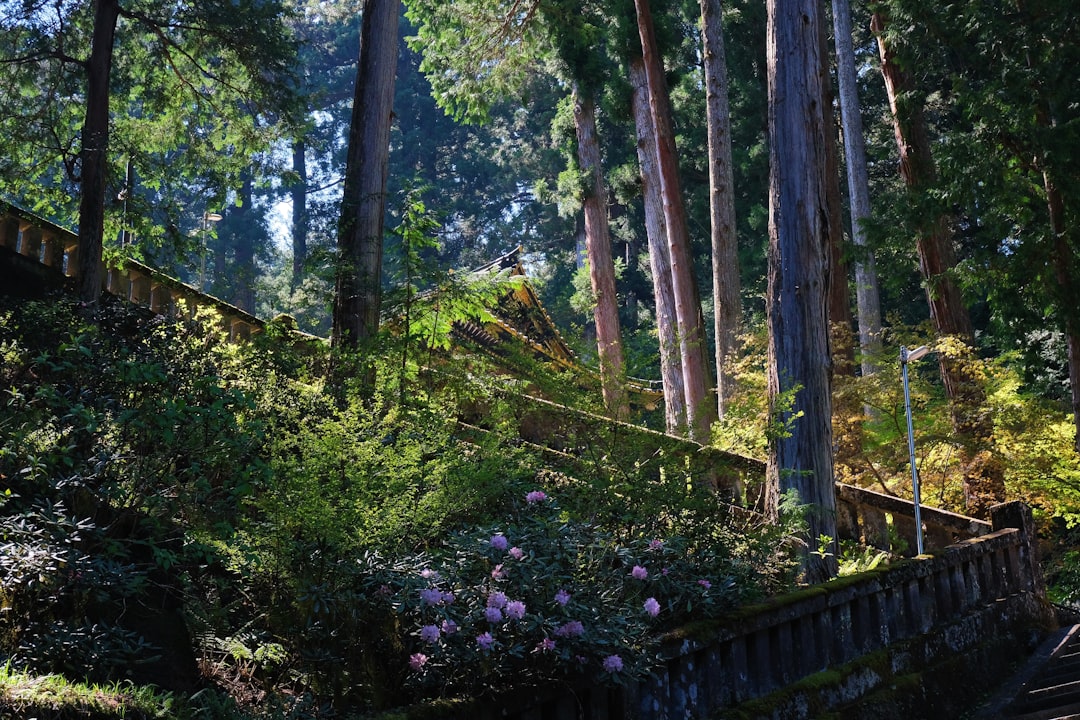
Before you even reach the ticket gates, you have kilometres of ancient cryptomeria cedars lining the approach roads. These trees are 400 years old, and shooting upward into their canopy with a wide-angle lens produces images that feel genuinely otherworldly. Arrive at dawn and you may catch shafts of light filtering through the branches — what landscape photographers call “god rays” — that are almost comically beautiful.
Ishi-Dori (Stone Pathway) and the Stone Lanterns
The approach to the main complex is flanked by hundreds of stone lanterns donated by feudal lords across Japan. Shoot these at ground level with a long focal length to compress the perspective, creating that iconic lantern-tunnel effect. After rainfall — and Nikko gets plenty of it — the moss on the stone turns an almost electric green that contrasts magnificently with the grey stone.
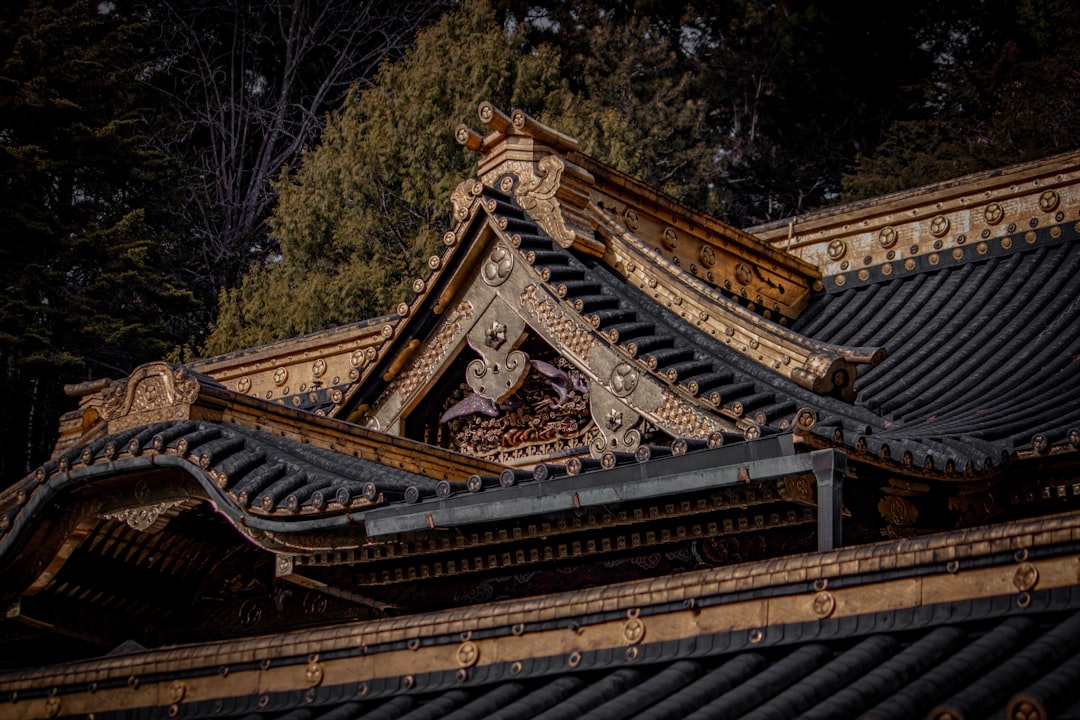
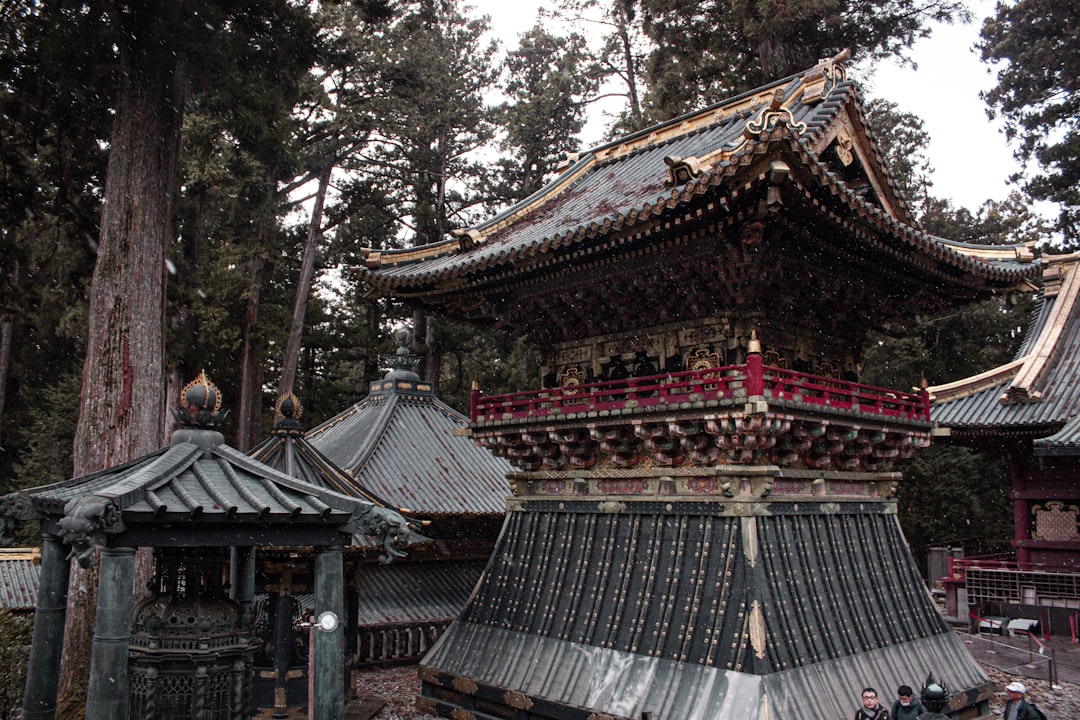
Yomeimon Gate: The Gate You Will Spend Three Hours Photographing
Locally called “Higurashi-mon” (the gate you could gaze at until sunset), Yomeimon is covered in white and gold lacquer, intricate carvings of dragons, phoenixes, peonies, and mythological figures. It is one of the most decorated single structures in all of Japanese architecture.
Shoot it at different times of day — the morning light catches the gold differently than the afternoon. Get close for detail shots of the carved panels: a sleeping cat here (the famous Nemuri-neko carving is nearby), a dancing crane there. Step back and shoot it framed by the surrounding smaller gates for context.
On my third visit, I arrived just as a group of Shinto priests in full regalia were processing through the gate for a morning ceremony. I had maybe thirty seconds to compose and shoot before they passed. I still have that image printed on my living room wall — the white robes, the gold gate, the cedar canopy, and one priest glancing sideways at my camera with what I can only describe as politely endured amusement.
The Sleeping Cat and the Path to Ieyasu’s Tomb
Pay the extra ¥520 for access to the inner sanctum and Ieyasu’s actual mausoleum. The path climbs 200 stone steps through a forest so dense and quiet that the shrine noise completely disappears. At the top, the tomb itself is deliberately understated — a simple bronze urn surrounded by ancient cedars. The contrast with the riot of decoration below is jarring and powerful. Shoot the stairway looking up, and then shoot it looking back down through the cedar trunks.
Rinno-ji Temple and Shinkyo Bridge
Just below the Toshogu complex, Rinno-ji Temple has a three-storied pagoda and lacquered halls that photograph beautifully in autumn foliage. The Shinkyo Bridge — a vermillion lacquered arch over the Daiya River — is perhaps the most photographed structure in Nikko. Shoot it from the riverbank below for the classic composition, with the bridge reflected in the water when conditions are calm.
Best Times and Conditions for Photography
Autumn (mid-October to mid-November) is the undisputed peak season for photographers. The Japanese maple (momiji) turns scarlet and gold against the dark cedar and lacquered shrine buildings in combinations that seem almost algorithmically designed for photographers.
Spring (late April to early May) brings cherry blossoms and azaleas around the approach avenues. The crowds are slightly thinner than autumn and the light is softer.
Weekday mornings are essential. Arrive before 8:30 AM and you will have the stone pathways largely to yourself for the first hour. By 11:00 AM, tour buses arrive in force.
Overcast days are genuinely excellent for shrine photography — the diffused light eliminates harsh shadows in the deeply carved panels and allows the gold lacquerwork to glow evenly.
Gear Recommendations for Nikko Toshogu
🗾 Book on Viator: Local artist’s lens on Japanese culture →
Bring a wide-angle lens (16-24mm equivalent) for the cedar avenue, forest interiors, and Yomeimon Gate in context. A macro or short telephoto (90-135mm) is invaluable for the carved detail panels. A small travel tripod is useful for the dimly lit inner shrine areas, though check posted restrictions — some areas prohibit tripods. A polarising filter will cut glare on the lacquered surfaces and deepen the sky on clear days.
Food and Drink: Fuelling the Photographer
Bring high-energy snacks in your bag for the morning — you do not want to break your shooting flow for a meal before 11:00 AM. Nikko town has excellent yuba (tofu skin) cuisine, a local specialty. For lunch, Gyoshintei restaurant near Rinno-ji serves traditional kaiseki-style yuba dishes in a beautiful wooden building overlooking a garden — the food photography potential alone justifies the ¥3,000 lunch set.
For a quick, budget-friendly option, the covered shopping street (Monzen) below the shrine has vendors selling nikumaki onigiri (rice balls wrapped in seared beef) that are outrageously good after a morning of climbing stone steps. If you are looking for more culinary exploration during your Tokyo visit, you might also enjoy exploring the Tsukiji Outer Market Food Tour before or after your Nikko day trip.
I was standing at one of those vendor stalls around 1:00 PM, steam rising from a nikumaki onigiri in my cold hands, when I looked back up the cedar avenue and realized the afternoon light had turned everything amber — the stone lanterns, the torii gates, the falling leaves. I dropped the wrapper in the bin, grabbed my camera, and ran back up the hill like an idiot. Worth every step.
Practical Tips for the Photography Day Tripper
- Entrance fees: ¥1,300 for the main Toshogu complex, plus ¥520 for the inner sanctum. Budget ¥2,500–¥3,000 total for all sites.
- Storage: Leave large rolling luggage at coin lockers at the station (¥400–¥600). You want to move freely.
- Battery and cards: Bring twice what you think you need. Cold mountain air drains batteries faster.
- Dress respectfully: Certain inner areas require quiet behavior and restricted photography — read the signs carefully.
- Return train: Book your return Tobu Limited Express in advance, especially on autumn weekends. Trains fill completely.
The Light That Stays With You
There is a specific Nikko memory I carry everywhere: late afternoon on my second visit, around 4:15 PM, when the last tour groups had descended and the shrine complex was nearly empty. The lanterns cast long shadows across the stone path, and a single crow landed on a stone lantern and sat completely still. The gold of Yomeimon was deepening to copper in the fading light, and somewhere up in the cedars, a wind moved through — a low, collective exhale. I took one photograph. It is the one I never quite manage to recreate, no matter how many times I go back. Maybe that is why I keep going.
Nikko Toshogu rewards the photographer who arrives early, moves slowly, and stays curious. It is not a shrine you shoot in two hours and check off a list. It is a place that reveals itself in layers — in the light on carved wood, in the mist between cedars, in the silence between the crowds. Go once, and you will already be planning your return before the train pulls back into Tokyo.
Ready to experience it?
🗾 Book on Viator: Pro guidance for iconic Tokyo photograph →