There’s a moment — and every photographer knows this feeling — when you raise your camera and realize the scene in front of you is so impossibly good that your hands start to tremble slightly. That moment, for me, happened 229 meters above Shibuya, standing on the open-air rooftop of Shibuya Sky as the sun began its slow, molten descent behind the Shinjuku skyline. The clouds caught fire in shades of tangerine and deep rose, and below me, the Shibuya Scramble — that iconic, chaotic intersection — pulsed like a living circuit board. If you’re a photographer visiting Tokyo, this observatory isn’t just a nice add-on to your itinerary. It is the itinerary.
I remember stepping off the elevator onto the rooftop and being hit immediately by two things: the wind — sharper and colder than I expected even in early October — and the sound, or rather the near-absence of it. The roaring city below became a low, distant hum, like white noise, and instead what I heard was the wind moving across the observation deck and the soft mechanical clicks of a dozen cameras around me. The light at that hour, around 4:45 PM, had a golden warmth that made every surface of Tokyo glow like polished copper.
Why Shibuya Sky Is a Photographer’s Dream
🎫 Book on Klook: Shibuya Sky Observatory sunset tours →
Let’s be honest: Tokyo has no shortage of observation decks. Tokyo Skytree, Tokyo Tower, the Metropolitan Government Building — they’re all worth visiting. But Shibuya Sky offers something genuinely different, and for photographers specifically, it wins on three fronts.
First, the open-air rooftop. Unlike glass-enclosed observatories where you’re always fighting reflections and distortion, Shibuya Sky’s top level is completely exposed to the sky. Your lens breathes open air. No smudged glass, no fluorescent lighting bouncing back into your frame, no compromises.
Second, the angle on Shibuya Scramble. From directly above, you can frame the crossing in a way no street-level photograph can capture — the radiating pedestrian lines, the surrounding building facades, the sheer geometry of organized chaos. Shoot it with a telephoto lens and compress the layers. Shoot it wide and let the city sprawl into every corner of your frame.
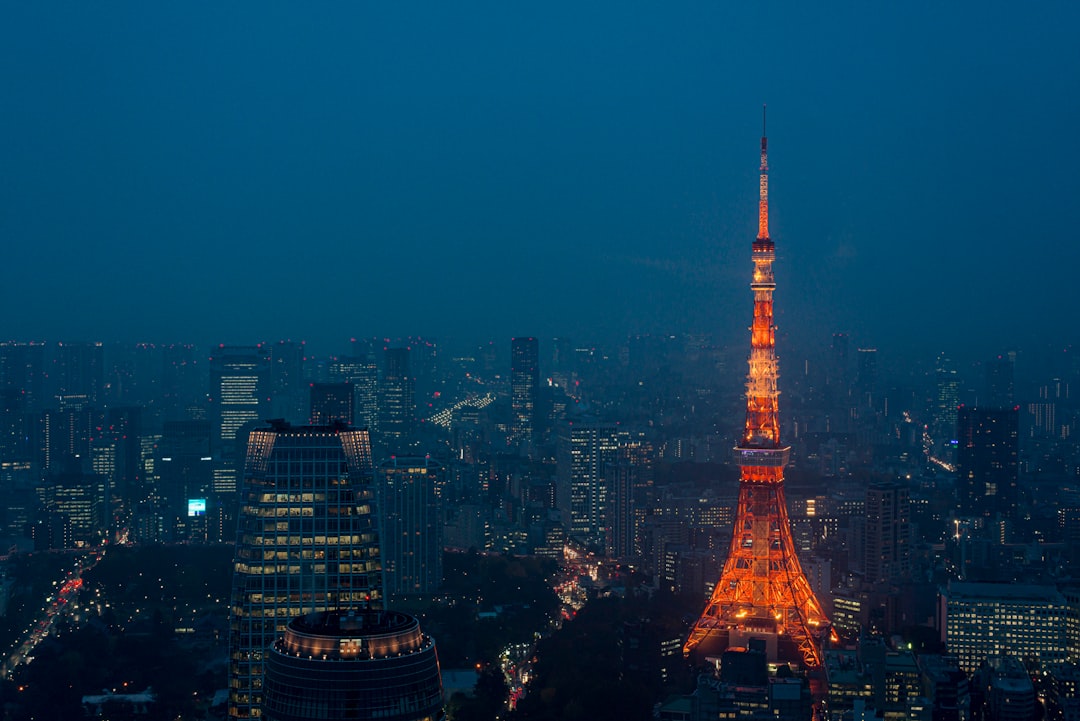
Third, the 360-degree unobstructed panorama. On a clear day, Mount Fuji is visible to the west. To the northeast, the twin antennas of Tokyo Skytree pierce the horizon. To the south, you can trace the silver thread of the Tamagawa River. Every direction is a different photograph.
Planning Your Visit Around the Light

The Golden Hour Window
For photographers, timing your visit to Shibuya Sky is everything. I’ll give you the honest breakdown:
Sunset timing by season:
– Spring (March–May): Sunset around 5:30–6:30 PM
– Summer (June–August): Sunset around 6:45–7:00 PM
– Autumn (September–November): Sunset around 5:00–5:30 PM
– Winter (December–February): Sunset around 4:30–5:00 PM
Autumn is the sweet spot. The air is crisp and clear, which dramatically improves visibility — you’re far more likely to see Fuji — and the earlier sunset means golden hour aligns with the early evening crowd at Shibuya below, giving your scramble shots maximum human density and energy.
Book the timed entry slot that begins approximately 90 minutes before sunset. This gives you time to get oriented, scout your angles during the softer pre-golden-hour light, and be fully positioned when the sky ignites.
Booking Your Tickets
This is non-negotiable: book online in advance. Shibuya Sky uses timed entry slots, and the sunset windows sell out days — sometimes weeks — ahead, especially on weekends and during autumn foliage season. Tickets cost ¥2,000 for adults (roughly $13–14 USD). The rooftop itself is the main event, but you’ll also pass through an impressive tunnel of LED installations and sky-themed exhibits on the way up, which offer their own moody, abstract photography opportunities.
Your Gear Checklist for Shibuya Sky
What to Bring
Because the deck is open-air, wind is a real factor. Here’s what I always pack for this shoot:
- A wide-angle lens (14–24mm range) for sweeping cityscapes and dramatic foreground-sky compositions
- A telephoto lens (70–200mm or longer) for compressing the Scramble layers and isolating distant landmarks like Fuji or Skytree
- A compact tripod or GorillaPod — full-size tripods are restricted on the rooftop, but compact flexible tripods are generally tolerated; always confirm current rules at the ticket desk
- A remote shutter or interval timer for long-exposure blue hour shots after sunset
- Extra batteries — cold wind drains batteries faster than you expect, and you’ll be shooting for 90+ minutes straight
- A windbreaker — even in summer, the exposed rooftop at altitude gets breezy; in winter, bring a proper jacket
What NOT to Bring
Full-size tripods are prohibited on the rooftop level. Drones are absolutely forbidden — the airspace above central Tokyo is tightly restricted, and I’ve seen people have equipment confiscated. Monopods are a gray area; check on arrival.
The Three Shots Every Photographer Needs
1. The Classic Scramble Overhead
Station yourself at the southern railing as early in your session as possible to claim prime position. With a telephoto at 135–200mm, aim straight down toward the crossing. Shoot in burst mode during the walk cycle — the moment all pedestrians are mid-crossing, you want that image. Use a shutter speed of at least 1/400s to freeze movement cleanly. The graphic, almost abstract geometry of hundreds of people crossing in all directions simultaneously is one of the most Tokyo-specific images you can bring home.
2. The Fuji Silhouette at Dusk
Face due west (use your compass app) and wait. As sunset approaches, if visibility is good, Fuji’s perfect cone will materialize as a dark silhouette against the gradient sky. Shoot with your widest angle, meter for the sky, and let the mountain go dark — the silhouette reads stronger than a detail shot at this distance. I bracket three exposures every time: one for the sky, one for the mid-tones, one for foreground detail, then blend in post.
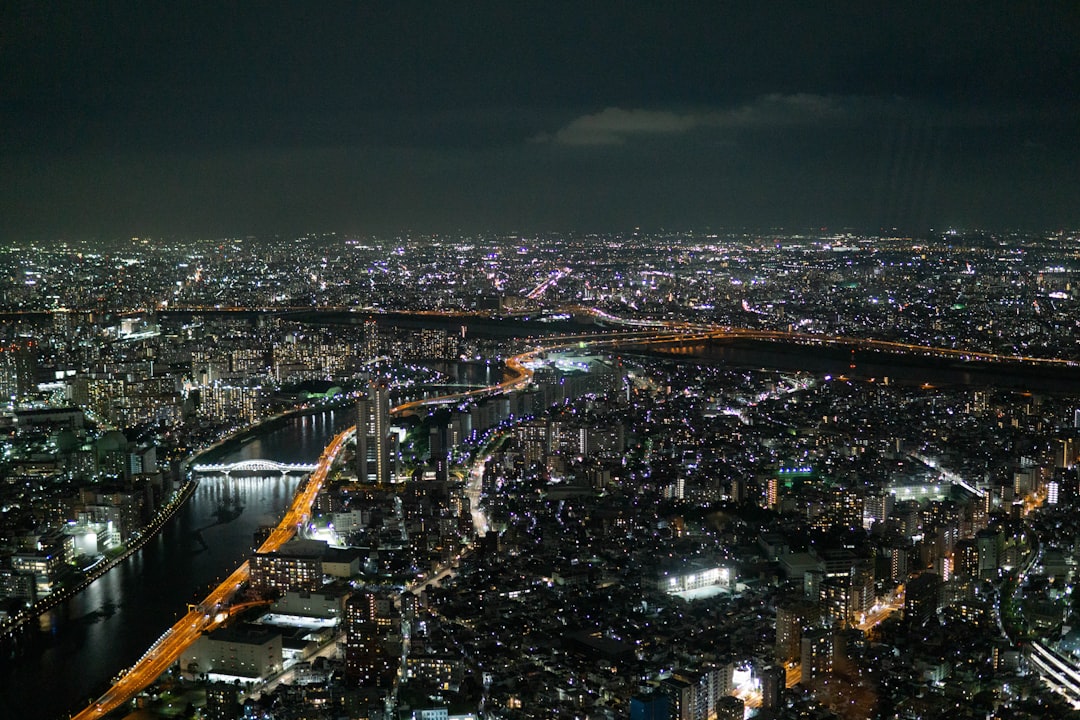
3. The Blue Hour City Grid
Don’t leave after sunset. The 20–30 minutes following sunset — blue hour — is when Tokyo’s grid comes alive with light. The sky transitions from orange to a deep cobalt, and every street below glows amber from artificial lighting. This is when your long exposures shine. Brace your GorillaPod against the railing, drop to ISO 400, narrow your aperture to f/8, and let the city paint itself onto your sensor. If you’re interested in exploring other atmospheric photography opportunities across Tokyo at different times of day, check out our guide to shooting Nakameguro Canal like a pro, which offers another compelling perspective on capturing Tokyo’s light and water.
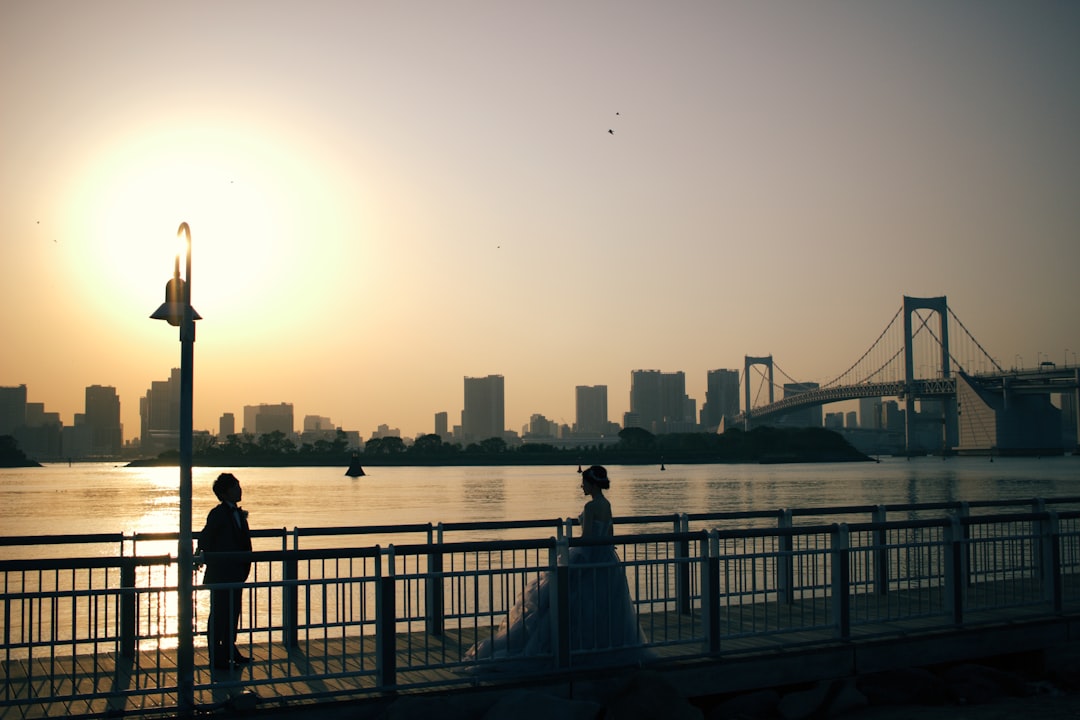
On my third visit, I almost missed a spectacular composition entirely because I was transfixed watching a wedding couple doing a photoshoot near the northwest corner of the deck. A staff member, noticing I was angling awkwardly to avoid shooting into the ceremony, quietly touched my elbow and guided me two meters to the left — revealing a clear sightline I’d never found before, perfectly framing the Skytree between two converging rooftop structures. “Better angle,” she said simply, and disappeared. That shot became the cover of my Tokyo portfolio.
Practical Tips for a Smooth Visit
Getting There
Shibuya Sky sits atop Shibuya Scramble Square, the skyscraper directly connected to Shibuya Station’s east exit. Take the elevator to the 14th floor first to purchase or collect your tickets, then ascend to the rooftop via a dedicated high-speed lift. The whole building is designed to funnel you upward as an experience, not just a destination. If you want to explore the wider Shibuya area and capture the neighborhood’s character beyond the observation deck, our photography guide to Shinjuku’s Omoide Yokocho explores atmospheric street photography in a neighboring district.
Food and Drink Strategy
There’s a café and bar area on the indoor observation level (floor 46) just below the rooftop. Post-shoot, I always stop for a craft beer or a Tokyo Sunset cocktail — yes, it’s actually on the menu — and watch the city transition fully into night from behind floor-to-ceiling glass. It’s the perfect decompression after 90 intense minutes of shooting. Prices are observatory-level (expect ¥800–1,500 per drink), but you’re paying for the view that keeps giving. For those seeking deeper culinary experiences in Tokyo, you might also consider Tokyo’s whisky bar hopping in Yurakucho for an evening activity that pairs well with sunset photography.
Accessibility and Crowd Management
Peak crowds gather right at the sunset moment. If you want cleaner compositions with fewer strangers’ heads in frame, position yourself early and commit to your spot. Moving around during peak sunset is like navigating a polite but immovable crowd — everyone has the same idea simultaneously.
The Moment That Will Stay With You
About fifteen minutes after the sun dropped below the Shinjuku skyline on my most recent visit, the sky did something I’ve only seen twice in years of travel photography: it turned a pure, electric violet — not purple, not blue, but a vivid violet that I’ve never successfully reproduced in any edit because it looks too unreal to be believed. The entire city below reflected it faintly, every glass surface tinted lavender. I put my camera down for exactly thirty seconds and just looked. Around me, I could hear other photographers going completely quiet too, the clicking stopping all at once. We were all just witnesses.
Final Thoughts: Is It Worth It?
For a photography enthusiast visiting Tokyo, Shibuya Sky at sunset is not optional — it is essential. At ¥2,000, it’s one of the best-value photography experiences in Asia relative to the images you’ll walk away with. Book your timed slot to begin 90 minutes before sunset, come prepared for wind, bring both a wide and telephoto lens, and stay through blue hour. The city will reward your patience with images that will genuinely make people ask: “Where is that? Is that real?”
Yes. It’s real. And once you’ve stood up there watching Tokyo burn gold and violet beneath you, you’ll be planning your return before you even land home.